
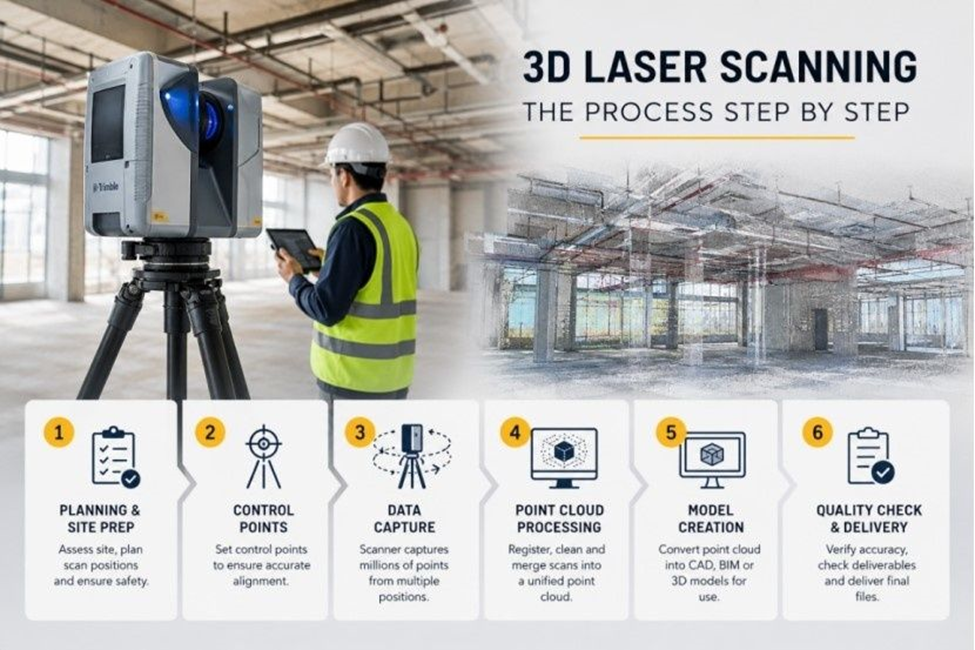
If you’ve never had a site scanned before, “3D laser scanning” can sound like a bit of a black box someone shows up with a tripod-mounted device, walks around for a while, and somehow you end up with a digital model of your building. Here’s what’s actually happening at each stage, in plain terms, from the moment the scanner arrives to the moment you get your final files.
1. Before the Scanner Even Turns On: Site Prep and Planning
A good scan starts before any equipment is switched on think of it like a photographer scouting a location before a shoot.
- The survey team walks the site to check access points, obstructions, and any areas that might be tricky to reach (a parked forklift, stacked materials, a locked plant room)
- A scan plan is drawn up deciding how many scan positions are needed and roughly where they should go
- Safety checks are done for restricted-access areas, working at height, or active construction zones
- Weather and lighting are checked for outdoor scans, since bright sun or rain can affect data quality
Real example: On a warehouse scan, skipping this step once meant a stack of pallets blocked a corner wall for the entire visit the team had to return a second day just for that one section. A five-minute walk-through would have caught it.
2. Setting Up Control Points for Accurate Scan Alignment
A laser scanner captures everything with incredible precision but only relative to itself. To make the data usable, it needs to be tied to real-world coordinates.
- Fixed control points are set around the site using GPS/GNSS or Total Station equipment
- Every scan position is measured against these points, like pinning a map to known landmarks
- Without them, individual scans might look fine on their own but drift apart when stitched together
- Control points also let this scan be compared later against a future scan of the same site useful for tracking settlement, movement, or construction progress
Think of control points as the skeleton the rest of the scan hangs off. Get this step wrong, and every measurement taken from the model afterward carries that same error.
3. Capturing the Site: How the Laser Scanner Collects Data
This is the part people picture when they think of laser scanning but it’s more methodical than it looks.
- The scanner is set up at a series of positions around and through the site
- At each position, it spins and fires laser pulses in every direction, timing how long each pulse takes to bounce back
- Each pulse becomes one point with an exact X, Y, Z position millions of them per position
- Positions are set up with deliberate overlap, which is what allows the software to stitch them into one model later
| Scan Setup Type | Typical Use Case | Approx. Coverage per Position |
| Tripod-mounted terrestrial scanner | Buildings, interiors, structural detail | High detail, smaller area |
| Mobile/handheld scanner | Corridors, tight spaces, fast walkthroughs | Faster coverage, moderate detail |
| Drone-mounted LiDAR | Large open sites, roofs, terrain | Wide area, lower per-point density |
The right setup depends on the site a warehouse interior and an open plot of land aren’t scanned the same way, and mixing methods is common on larger projects.
4. Turning Raw Points into a Usable Point Cloud
Straight out of the scanner, the data is just a stack of separate scan positions not yet a single model.
- Each position’s data is “registered,” meaning it’s aligned and merged with the others using the overlap and control points
- Stray points from dust, reflections, or people walking through mid-scan are filtered out
- Color is often layered onto the points if the scanner captured photos alongside the laser data
- The result is one unified point cloud a single dataset covering the entire site in 3D
At this stage you can already open the file and take measurements, but it isn’t yet in a format most design or engineering software can build on directly.
5. From Point Cloud to CAD, BIM, or 3D Model
This is where the raw data becomes something a design or construction team can actually use.
- Technicians trace over the point cloud to build 2D CAD drawings, 3D models, or BIM elements
- Walls, columns, slabs, MEP routing, and other features are extracted and labeled
- The model is checked back against the point cloud to make sure nothing was missed or misread
- Output formats are matched to what the client’s software needs DWG, RVT, IFC, or point cloud formats like E57 and LAS
The level of detail here depends on what the project needs. A rough existing-conditions model for a renovation looks very different from a fully modeled BIM asset used for MEP coordination.
6. Quality Checks Before the Final Deliverable Goes Out
Before anything is handed over, it goes through a final review this is the step clients rarely see but always benefit from.
- Measurements from the model are spot-checked against the original scan data
- Alignment is verified against the control points set up in step 2
- Deliverables are checked against the format and accuracy standards agreed with the client
- Any flagged discrepancies are corrected before final sign-off
Only after this does the data get packaged and sent as a point cloud, CAD file, BIM model, or a combination, depending on what was scoped at the start.
Frequently Asked Questions
Q1: How long does a 3D laser scan take? It depends on the size and complexity of the site. A single room can be scanned in under an hour, while a multi-story building or large industrial site may take a full day or more across multiple scan positions.
Q2: Do I need to empty the space or clear the site before scanning? Not entirely, but reducing clutter, moving vehicles, and clearing sightlines to key areas helps the scanner capture cleaner data and reduces the number of positions needed.
Q3: Can scanning be done while the site is still occupied or under construction? Yes, in most cases. The team plans scan positions around ongoing activity, though very busy areas may need to be scanned during quieter hours for accuracy.
Q4: What file formats will I receive at the end? This depends on what’s scoped upfront common outputs include point cloud formats (E57, LAS) and modeled formats like DWG, RVT, or IFC for CAD/BIM use.
Q5: How accurate is the final model compared to the physical site? With proper control points and registration, professional laser scanning typically achieves millimeter-level accuracy, though the exact tolerance depends on the equipment and site conditions.
Q6: Does weather or lighting affect the scan? Outdoor scans can be affected by strong direct sunlight, rain, or fog. Indoor scans are generally unaffected by weather but do depend on consistent lighting for color capture.
Why This Process Matters
Skipping steps rarely saves time it just moves the problem downstream. A scan without proper control points might look fine on screen but be off by centimeters on site. A rushed registration step can leave gaps that only show up once a design team starts working from the model. Understanding the full sequence helps you ask the right questions when scoping a scan and know what you’re actually paying for at each stage.
For projects in Abu Dhabi, survey deliverables (including scan-derived drawings) often need to align with standards set by the Department of Municipalities and Transport (DMT), particularly for submissions tied to building permits, land plans, or infrastructure approvals.
How Accurate Survey Work (ASW) Handles This
At Accurate Survey Work L.L.C., our 3D Laser Scanning service follows this exact process, backed by Control Points, CAD Services, and BIM Modeling for the final deliverables. 👉 Talk to our survey team to scope a scan for your site.