
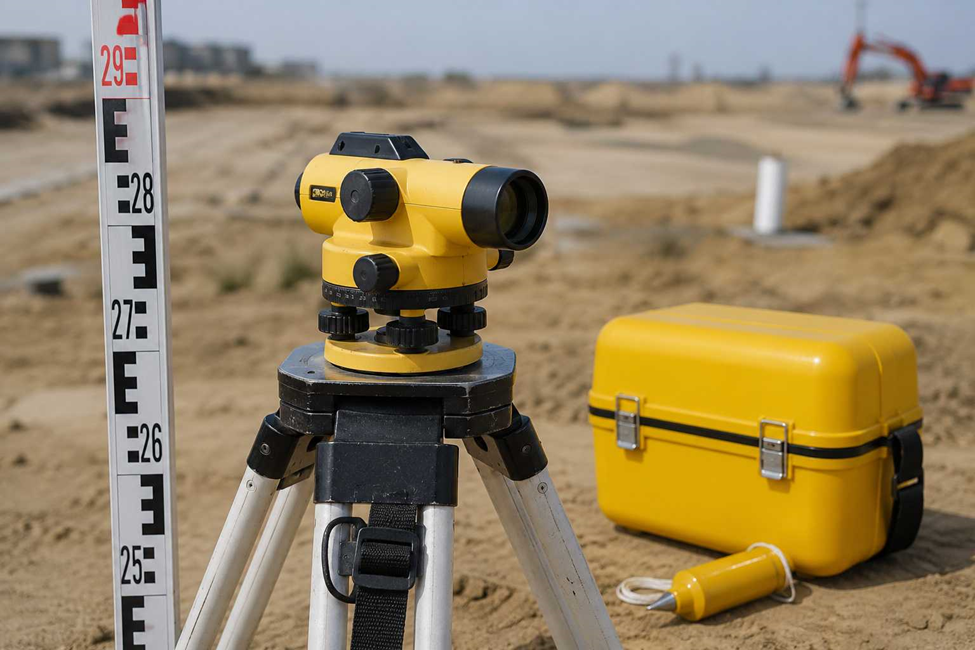
Before anyone pours a slab or lays a drain, someone has to check the heights on the ground. For decades, the dumpy level has done this job on sites across the world. Although newer instruments exist, it still earns its place because it is simple, tough and cheap to run. In this guide, we cover what a dumpy level is, its parts, how to set it up and how to work out reduced levels.
Quick answer: A dumpy level is a surveying instrument that gives a perfectly horizontal line of sight. Surveyors read a levelling staff through it to find height differences between points.
What Is a Dumpy Level?
A dumpy level is a short, rigid telescope fixed on a tripod. Because the telescope sits level, the surveyor can sight a staff and read heights with confidence. The name comes from its short, stubby shape. Unlike a total station, it does not measure angles or distances. Instead, it does one job well, which is to measure height differences.
Surveyors use it in four main ways:
- Surveyors find the height difference between two points, because every levelling job starts there.
- Crews set out level foundations, since a slab or footing must sit at the design height.
- Teams also check ground levels for roads, plots and drains, so water runs the right way.
- Finally, they carry levels across a site, which keeps every area on the same reference.
Main Parts of a Dumpy Level
Each part has a clear job, so it helps to know them before you go to site.
- Telescope: It lets you sight the staff, and its crosshairs mark the exact reading.
- Eyepiece: It sits at the back, so you can focus the crosshairs until they look sharp.
- Objective lens: It faces the staff, and it brings the staff image into focus.
- Bubble tube: This curved glass tube holds a bubble, so a centred bubble proves the sight line is horizontal.
- Circular bubble: It gives a quick, rough check before the fine levelling starts.
- Foot screws: Three screws raise or lower the head, so you can bring the bubble to the centre.
- Levelling head: It holds the foot screws and joins the instrument to the tripod.
- Trivet stage: It sits between the head and the tripod, and it locks the instrument in place.
- Vertical spindle: The telescope turns around this axis.
- Tripod: It holds everything steady at a comfortable working height.
- Plumb bob (optional): It hangs below the instrument, so you can centre it over a station mark.
How to Set Up a Dumpy Level on Site
Good results depend on a careful setup. Follow these steps in order.
- First, pick firm ground with a clear view of the points you need to level. Avoid soft soil, and keep away from vibration from vehicles or machines.
- Next, spread the tripod legs to about chest height and press them into the ground. The head should look level by eye.
- Then screw the level onto the tripod head with the centring screw. Snug is enough, so do not overtighten.
- After that, level the instrument roughly with the three foot screws. Turn two screws together, then adjust the third, until the circular bubble sits in the middle.
- Now level it finely. Turn the telescope so it lines up with two foot screws, and turn those screws in opposite directions until the tube bubble sits in the centre. Then rotate the telescope 90 degrees and use the third screw. Keep going until the bubble stays central in both positions.
- Next, remove parallax. Point the telescope at a bright surface and focus the eyepiece until the crosshairs look sharp. Then focus on the staff. Finally, move your eye up and down slightly, and if the crosshair does not shift against the staff image, the parallax is gone.
- Once the view is sharp, take the reading. Sight the staff on the point and read the value where the horizontal crosshair cuts it.
- Before you move, check the bubble again. If it has drifted, level again and repeat the reading, because a drifted bubble means a wrong reading.
Applications of the Dumpy Level
Dumpy levels suit many jobs on a UAE site.
- Construction layout: Crews fix benchmarks and carry design heights from the drawings to the ground, so foundations, columns and walls sit at the right level. This work also supports structural drawings.
- Height difference measurement: This is the core job. By taking back sight and fore sight readings, the surveyor works out the exact rise or fall between points.
- Grading and drainage: Surveyors check slopes for roads, canals, pipelines and building pads, so water drains as designed. For buried pipes, see our utility survey service.
- Topographic work: Steady level readings build height profiles and contour data before design starts. Read more about our topographic survey service.
- Road and infrastructure alignment: Levels help control gradients on roads, rail tracks and drains, so the work stays within tolerance.
- Landscaping and irrigation: Crews level terraces, garden beds and channels, because water flow depends on small height changes.
Dumpy Level vs Auto Level vs Total Station
These three instruments overlap, but each has a different strength.
- A dumpy level needs manual levelling with foot screws and a bubble. It costs little, and it is excellent for height work.
- An auto level has an internal compensator, so it keeps the sight line horizontal by itself. As a result, it is faster to set up.
- A total station measures angles and distances as well as heights, so it suits layout, topography and as-built checks. However, it costs more and needs more training.
For heights alone on a small or medium site, a level is usually enough. When you need positions too, a total station is the better choice. To compare prices, read our guide on topographic survey equipment cost in the UAE, or see our GPS total station guide.
How to Calculate Reduced Levels (RL) with a Dumpy Level
A reduced level (RL) is the height of a point compared with a fixed reference, called a benchmark (BM). For example, a surveyor might fix the benchmark at 50.000 m. Two methods are common.
Height of Instrument (HI) Method
- First, take a back sight (BS) on the benchmark.
- Next, work out the height of instrument: HI = RL of BM + BS.
- Then take intermediate sight (IS) or fore sight (FS) readings on the other points.
- After that, find each RL: RL = HI − IS (or FS).
- When you move the instrument, take a fore sight on the last point, which is the turning point. Then work out the new HI and carry on.
Rise and Fall Method
- First, compare each staff reading with the one before it.
- If the new reading is smaller, the ground has risen, but if it is larger, the ground has fallen.
- Next, calculate the change: Rise or Fall = previous reading − current reading.
- Then add the rise to the previous RL, or take away the fall: new RL = previous RL + rise (or − fall).
Worked Example
Say the benchmark is 50.000 m and the first back sight reads 1.250 m. So HI = 50.000 + 1.250 = 51.250 m. Point A reads 0.980 m, so its RL is 51.250 − 0.980 = 50.270 m. Point B is a turning point and reads 1.640 m, so its RL is 51.250 − 1.640 = 49.610 m. After the move, the back sight on B reads 1.420 m, which gives a new HI of 49.610 + 1.420 = 51.030 m. Point C reads 1.100 m, so its RL is 51.030 − 1.100 = 49.930 m.
Now run the arithmetic check. The back sights add up to 1.250 + 1.420 = 2.670 m, and the fore sights add up to 1.640 + 1.100 = 2.740 m. The difference is −0.070 m. Meanwhile, the last RL minus the first RL is 49.930 − 50.000 = −0.070 m. Because the two figures match, the readings are correct.
Things to Check When Levelling in the UAE
- Many projects need levels tied to an official benchmark, so confirm the datum with Dubai Municipality or the Department of Municipalities and Transport – Abu Dhabi.
- Your site benchmarks also feed our control point work and gate level computation.
- Strong sun can disturb the bubble, so shade the instrument while you work.
- Even a small calibration error spreads across every reading, so check the instrument regularly.
Conclusion
The dumpy level remains a trusted tool for accurate levelling. It is simple, dependable and low in cost, so it suits many construction and engineering jobs. As a result, surveyors who know its parts, setup and calculations collect cleaner data and avoid expensive mistakes on site.
Accurate Survey Work L.L.C. (ASW Abu Dhabi) provides land surveying for construction, infrastructure and engineering projects across the UAE. Our crews use levels, total stations, GNSS and other modern tools, so every stage of your project gets reliable data. See our project references, learn about our GPS survey service, or contact our team to discuss your needs.
Frequently Asked Questions
What is a dumpy level used for?
It measures height differences between points. Crews use it for construction, roads, drainage and foundation levelling.
What is the difference between a dumpy level and an auto level?
A dumpy level needs manual levelling with foot screws and a bubble. An auto level levels its own sight line, so it is faster to use.
How accurate is a dumpy level?
A well-calibrated dumpy level gives accurate heights. However, the result still depends on the setup and the surveyor’s technique.
How do you calculate reduced level with a dumpy level?
Use the height of instrument method or the rise and fall method. Both start from a benchmark and use staff readings.
What are the main parts of a dumpy level?
The main parts are the telescope, eyepiece, objective lens, bubble tube, circular bubble, foot screws, levelling head, trivet stage and tripod. Together, they keep the sight line level.
Why do surveyors remove parallax?
Parallax makes the crosshair seem to move against the staff, so it causes reading errors. Focusing the eyepiece and lens removes it.
Is a dumpy level still used in modern surveying?
Yes. Although total stations and GNSS receivers are common, a dumpy level is still a cheap and reliable choice for levelling, foundation checks and grading.

Pingback: Dumpy Level vs Auto Level: What Actually Changes on Site Dumpy Level vs Auto Level: Which One Suits Your Site? - Accurate Survey Work LLC
Pingback: Dumpy Level & Gate Level Checks for Abu Dhabi Plots