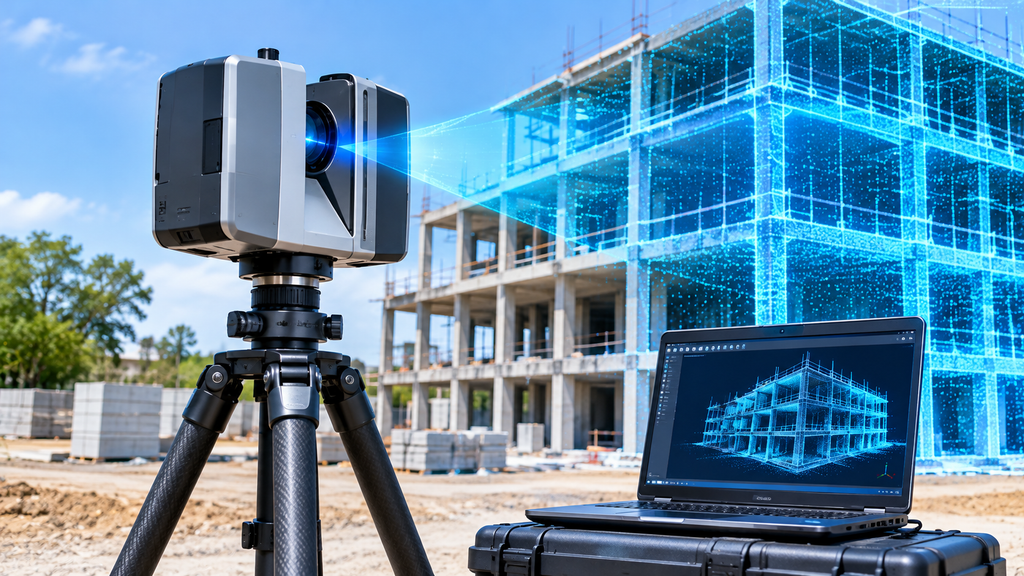
Some jobs defeat a tape and a total station. The site is crowded with pipework, the structure has curves, or nobody can afford a second site visit to measure something that was missed. In these cases, 3D laser scanning gives you the whole space in one pass.
Scanning is not the right answer for every job, though. This guide helps you decide. It explains what a scanner captures and what it misses, where scanning pays off, what files you receive, and how to prepare your site.
What Is 3D Laser Scanning?
3D laser scanning is a method of measuring a place by firing laser pulses at it. The scanner sends out pulses in every direction, then records how long each one takes to return. From that timing, it calculates the distance to every surface it hits.
Each measurement becomes a point with X, Y and Z coordinates. A scanner records a huge number of these points, so together they form a dense 3D picture of the space. Surveyors call this picture a point cloud. Instead of a handful of measured spots, you get the shape of everything the scanner could see.
What a Laser Scanner Captures and What It Misses
A scanner records visible surfaces quickly and in great detail. Walls, floors, ceilings, columns, beams, pipes, ducts, steelwork, façades and ground all show up clearly. Many scanners also take photographs, so the point cloud can carry real colour.
Even so, a scanner has limits, and knowing them prevents surprises.
- Hidden areas: The laser cannot see behind objects. A pipe in front of a wall leaves a shadow on the wall. Surveyors fix this by scanning from several positions.
- Shiny and clear surfaces: Glass, mirrors and polished metal can scatter or reflect the beam, which leaves gaps or false points.
- Very dark surfaces: They return less of the laser, so readings can be weaker.
- Moving things: People, vehicles and swinging cranes can appear as ghost points in the cloud.
- Weather and dust: Heavy dust, rain or fog can add noise to the data.
A good scanning team plans around these limits before arriving on site.
Where 3D Laser Scanning Pays Off on UAE Projects
Scanning earns its cost on projects with complex shapes, tight access or heavy documentation needs. The most common examples include:
- Existing buildings that need as-built drawings or a refurbishment survey. The 3D laser scanner for buildings guide covers this case in more detail.
- Industrial plants, with dense pipework and equipment that is hard to measure by hand.
- Facades and structures with curves, ornament or unusual geometry.
- Roads, bridges and tunnels, where teams need cross-sections and clearances.
- Sites that change quickly, where a scan records the exact condition on a given day.
The pattern is clear. When a job has many details, a short window on site, or a need for a permanent record, scanning usually wins.
Scanning vs Traditional Survey Methods: Choosing the Right Tool
Scanning does not replace every other method. Each tool suits a different question.
A total station measures chosen points with very high accuracy. It works best for setting out, control and a limited number of features. A topographic survey with levels and contours suits open land. A drone covers large outdoor areas quickly. A scanner shines when you need the full shape of something, indoors or outdoors, at close range.
In practice, teams combine these methods. The surveyor ties each scan to control points, so the point cloud sits in the same coordinate system as the rest of the project. Without that link, a scan is only a picture. With it, you can measure from it and overlay other data.
A simple rule helps. If you need a few exact points, use a total station. If you need everything in a space, use a scanner.
What You Receive After the Scan: Point Clouds and Other Deliverables
After the fieldwork, the team joins the individual scans into one registered point cloud. You can then receive it in several forms, depending on what you need.
- The point cloud itself, in formats such as E57, LAS or RCP. E57 works across most software, while RCP opens directly in Autodesk products.
- Panoramic images that let you look around the site on screen.
- 2D drawings, including plans, sections and elevations drawn from the cloud.
- A 3D model, when the project needs one for design or coordination.
Keep file size in mind. A full point cloud can run to many gigabytes, so ask the team how they will send it and which software you need to open it. For most design teams, the practical deliverable is a set of clean drawings or a model, not the raw cloud.
How to Prepare a Site and Brief the Scanning Team
A little preparation makes the scan faster and the data cleaner.
Clear the areas you want scanned as far as you can. Move loose items and open doors that lead to rooms in scope. Arrange access for every floor and for roofs, plant rooms and basements, since a scanner cannot capture a space it cannot enter. Tell the team about reflective surfaces, restricted areas and safe working rules.
Also give a clear brief. State what the scan is for, the level of detail you need, the coordinate system and the format of the final files. A scan for a quick as-built check needs less detail than a scan for a precise fit-out. If the project involves a government building or a regulated site, confirm the access rules with the owner first. For building projects in Abu Dhabi, the Department of Municipalities and Transport sets out the requirements you may need to follow.
From Point Cloud to CAD Drawing and BIM Model
The point cloud is the raw material. Designers rarely work from it directly. Instead, a drafter traces the cloud and draws walls, openings, levels and services as clean linework. A good CAD service turns the cloud into drawings your team can edit and share. The article on the CAD drawing explains what those sheets should contain.
For larger or more complex projects, the team goes one step further and builds a BIM model from the scan. The model holds intelligent objects, such as walls and pipes, which designers can coordinate across disciplines. The scan guarantees that the model starts from what truly exists on site, not from old drawings that may be wrong.
Conclusion
3D laser scanning gives you a complete record of a space in a single visit. It works best on complex, crowded or fast-changing sites, and it needs proper control, good preparation and a clear brief. Know what the scanner cannot see, choose the deliverables you need, and ask how the point cloud will turn into drawings or a model. Those decisions determine how useful the scan becomes.
Frequently Asked Questions
What is 3D laser scanning used for?
It records the exact shape of buildings, plants, roads and structures as a point cloud. Teams use it for as-built drawings, refurbishment, clash checks and records.
Is 3D laser scanning better than a total station?
Neither is better for every job. A total station gives a few precise points, while a scanner captures everything in view.
What can a laser scanner not capture?
It cannot see behind objects. It also struggles with glass, mirrors, very dark surfaces and moving people or vehicles.
What file formats do I receive from a scan?
Common formats include E57, LAS and RCP for the point cloud, plus DWG and PDF for drawings, or a model file when needed.
Do I need a point cloud or a drawing?
Most design teams need drawings or a model made from the cloud. Ask for the raw cloud only if you have the software and skills to use it.
Pingback: Laser Mapping: Tripod, Vehicle, Drone or Handheld?